<em>Mac</em>Book项目 2009年学校开始实施<em>Mac</em>Book项目,所有师生配备一本<em>Mac</em>Book,并同步更新了校园无线网络。学校每周进行电脑技术更新,每月发送技术支持资料,极大改变了教学及学习方式。因此2011
2021-06-01 09:32:01
Reference
https://zhuanlan.zhihu.com/p/87864677
1、安裝VSCode,直接在官網下載 安裝即可
2、設定C/C++環境,安裝MinGW編譯器,也可以在 官網 下載安裝
3、MinGW編譯器剛才下載的是個下載器,直接雙擊安裝,設定X86和WIN32,指定下載目錄(需要記住,之後會用,並且目錄不能有空格)
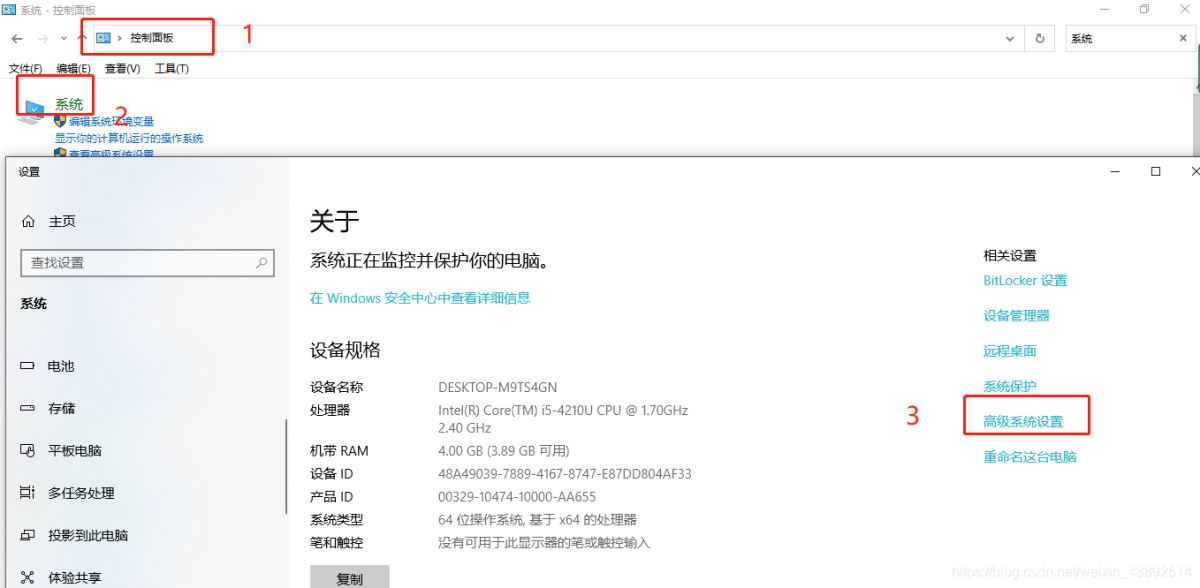
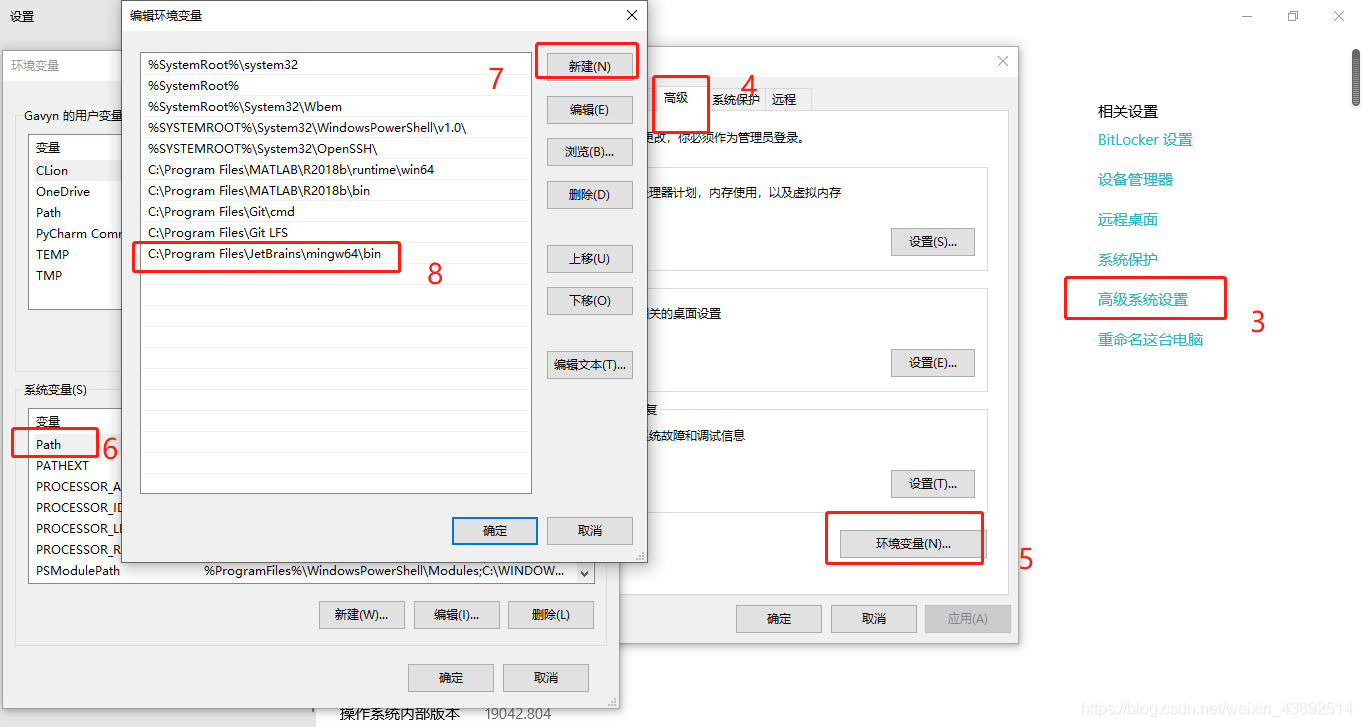
4、下載完成之後,將剛才下載目錄下的bin資料夾目錄設定到環境變數裡
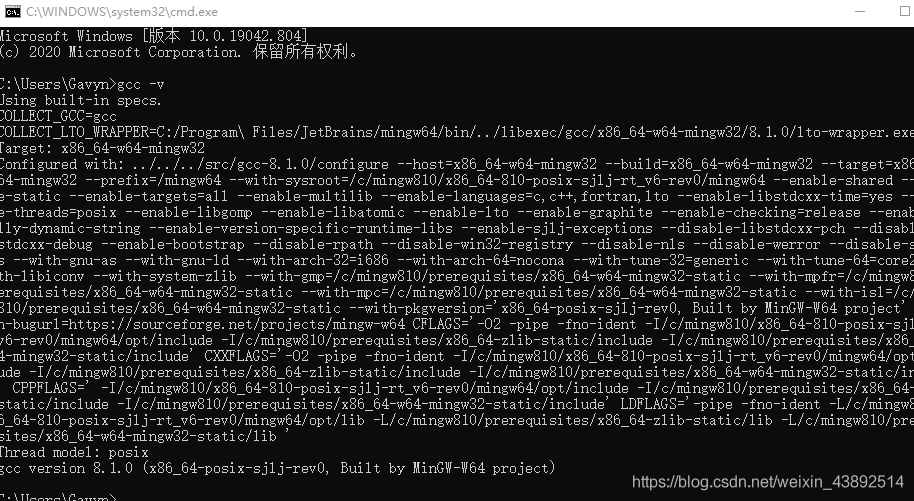
5、CMD視窗輸入gcc -v不報錯就證明設定成功
6、VSCode中搜尋C/C++擴充套件進行安裝
7、開始設定C/C++環境:
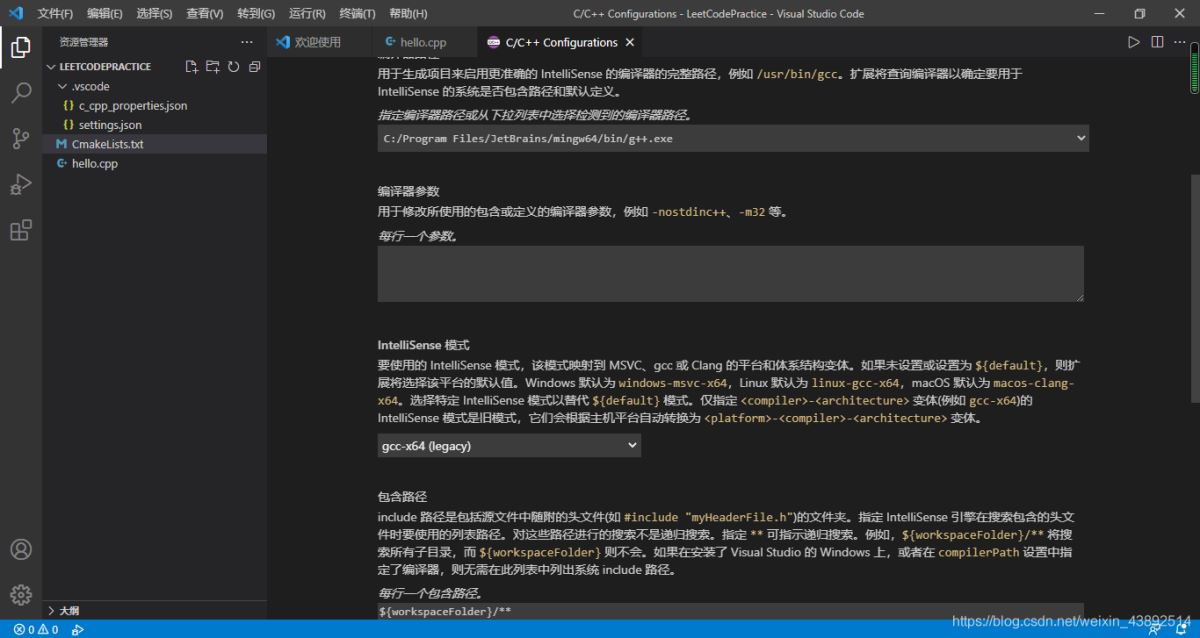
(1).設定編譯器
VSCode中 Ctrl+Shift+P調出命令面板,輸入C/C++,選擇「Edit Configurations(UI)」進入設定。設定一,找到編譯器路徑:設定你剛才的安裝路徑下的g++.exe,例如 D:/mingw-w64/bin/g++.exe。 設定二,找到IntelliSense 模式:gcc-x64;
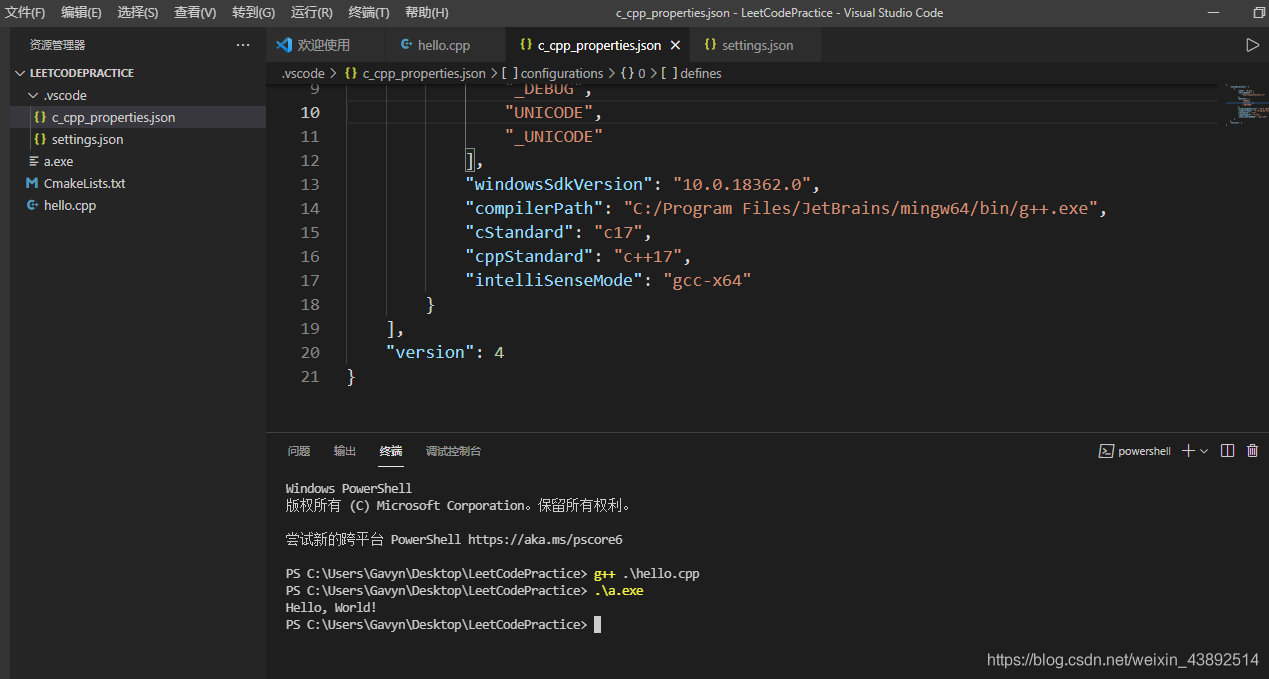
設定完成後,此時在側邊欄可以發現多了一個.vscode資料夾,並且裡面有一個c_cpp_properties.json檔案,內容如下,說明上述設定成功。現在可以通過Ctrl+<`快捷鍵開啟內建終端並進行編譯執行了。
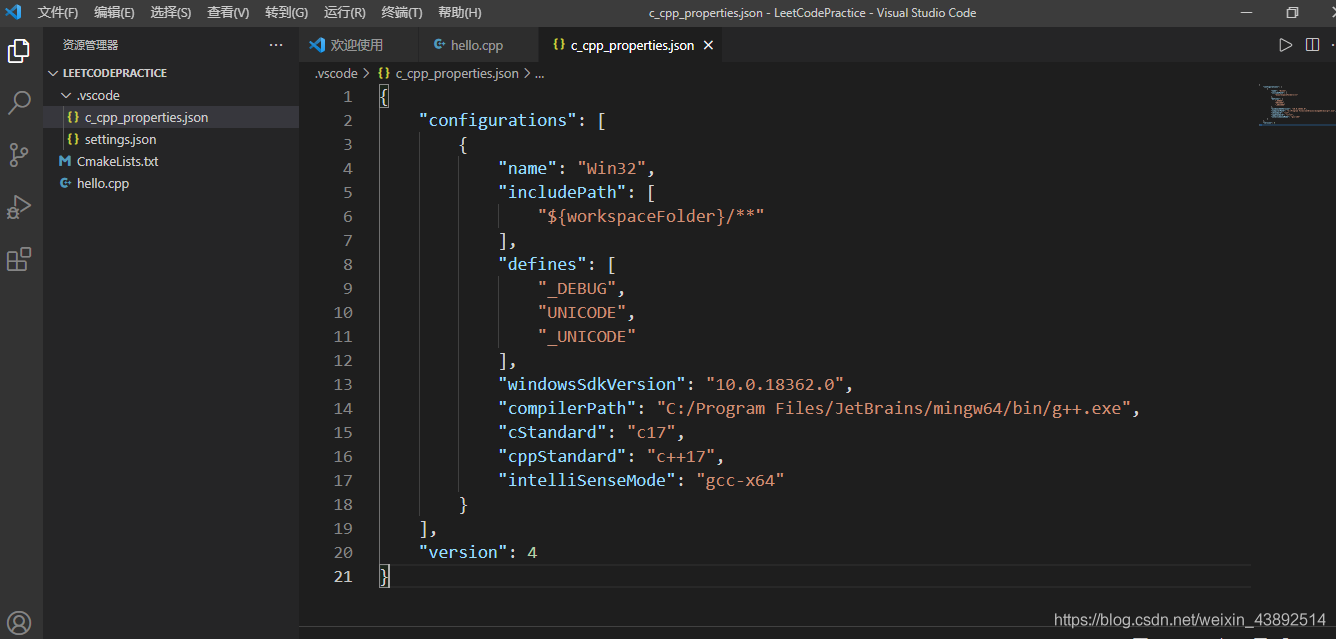
{
    "configurations": [
        {
            "name": "Win32",
            "includePath": [
                "${workspaceFolder}/**"
            ],
            "defines": [
                "_DEBUG",
                "UNICODE",
                "_UNICODE"
            ],
            "windowsSdkVersion": "10.0.18362.0",
            "compilerPath": "C:/Program Files/JetBrains/mingw64/bin/g++.exe",
            "cStandard": "c17",
            "cppStandard": "c++17",
            "intelliSenseMode": "gcc-x64"
        }
    ],
    "version": 4
}
(2).設定構建任務
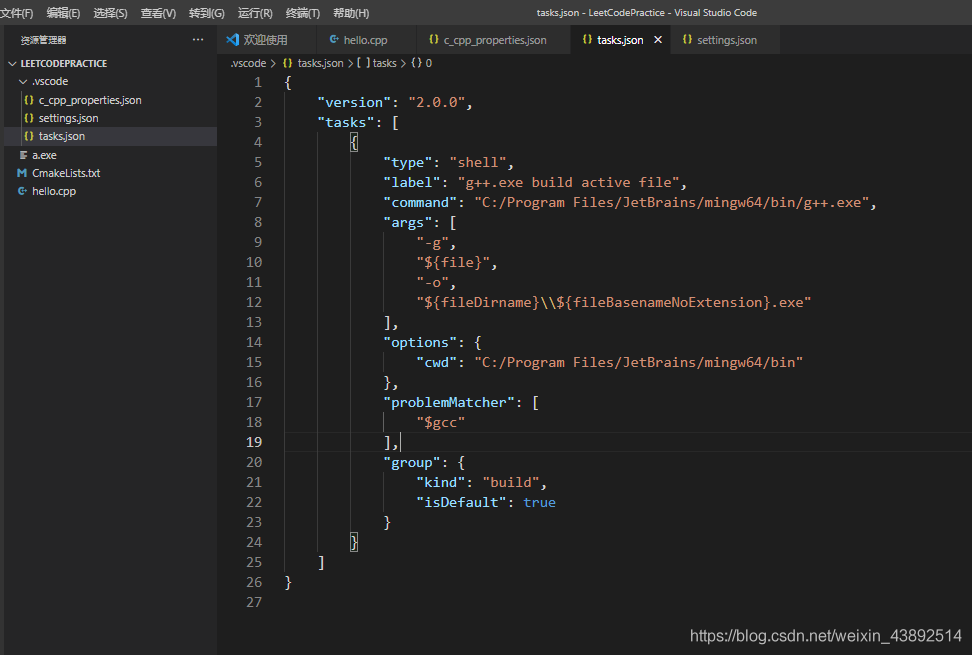
接下來,建立一個tasks.json檔案來告訴VS Code如何構建(編譯)程式。該任務將呼叫g++編譯器基於原始碼建立可執行檔案。 按快捷鍵Ctrl+Shift+P調出命令面板,輸入tasks,選擇「Tasks:Configure Default Build Task」:將task.json內容複製進去,記著更改目錄
{
	"version": "2.0.0",
	"tasks": [
		{
			"type": "shell",
			"label": "g++.exe build active file",
			"command": "C:/Program Files/JetBrains/mingw64/bin/g++.exe",
			"args": [
				"-g",
				"${file}",
				"-o",
				"${fileDirname}\${fileBasenameNoExtension}.exe",
				"-std=c++17"
			],
			"options": {
				"cwd": "C:/Program Files/JetBrains/mingw64/bin"
			},
			"problemMatcher": [
				"$gcc"
			],
			"group": {
				"kind": "build",
				"isDefault": true
			}
		}
	]
}
(3).設定偵錯設定
這裡主要是為了在.vscode資料夾中產生一個launch.json檔案,用來設定偵錯的相關資訊。點選選單欄的Debug–>Start Debugging:

生成了一個launch.json檔案
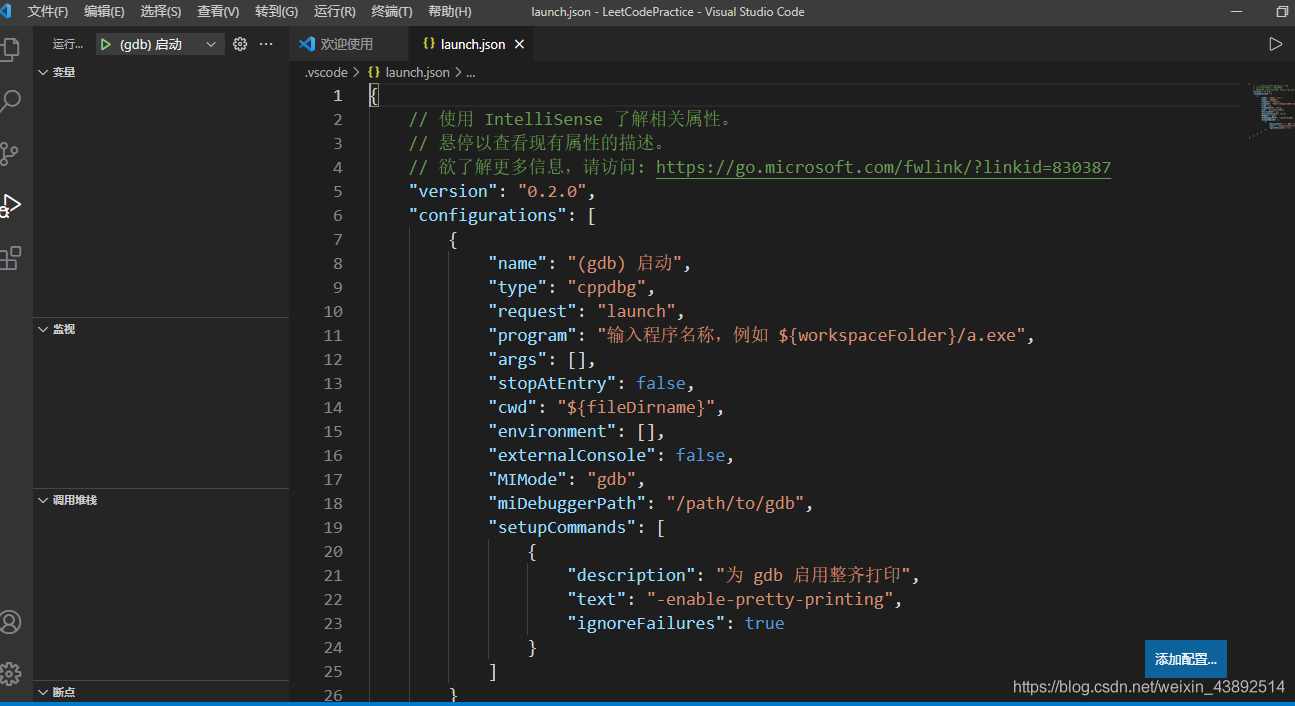
{
    // Use IntelliSense to learn about possible attributes.
    // Hover to view descriptions of existing attributes.
    // For more information, visit: https://go.microsoft.com/fwlink/?linkid=830387
    "version": "0.2.0",
    "configurations": [

        {
            "name": "(gdb) Launch",
            "preLaunchTask": "g++.exe build active file",
            "type": "cppdbg",//只能為cppdbg
            "request": "launch",
            "program": "${fileDirname}\${fileBasenameNoExtension}.exe",//偵錯程式的路徑名稱
            "args": [],//偵錯傳遞引數
            "stopAtEntry": false,
            "cwd": "${workspaceFolder}",
            "environment": [],
            "externalConsole": false,
            "internalConsoleOptions": "neverOpen",
            "MIMode": "gdb",
            "miDebuggerPath": "C:/Program Files/JetBrains/mingw64/bin/gdb.exe",
            "setupCommands": [
                {
                    "description": "Enable pretty-printing for gdb",
                    "text": "-enable-pretty-printing",
                    "ignoreFailures": true
                }
            ]
        }
    ]
}
設定完成,建立個cpp檔案測試一下吧。.vscode資料夾可以先儲存一份,下次可以直接複製到其他資料夾下使用。

VsCode / Cmake 工程
https://www.cnblogs.com/iwiniwin/archive/2020/09/21/13705456.html
https://blog.csdn.net/weixin_43822014/article/details/114500763
到此這篇關於VsCode設定C++/Cmake的文章就介紹到這了,更多相關VsCode設定C++/內容請搜尋it145.com以前的文章或繼續瀏覽下面的相關文章希望大家以後多多支援it145.com!
相關文章
<em>Mac</em>Book项目 2009年学校开始实施<em>Mac</em>Book项目,所有师生配备一本<em>Mac</em>Book,并同步更新了校园无线网络。学校每周进行电脑技术更新,每月发送技术支持资料,极大改变了教学及学习方式。因此2011
2021-06-01 09:32:01
综合看Anker超能充系列的性价比很高,并且与不仅和iPhone12/苹果<em>Mac</em>Book很配,而且适合多设备充电需求的日常使用或差旅场景,不管是安卓还是Switch同样也能用得上它,希望这次分享能给准备购入充电器的小伙伴们有所
2021-06-01 09:31:42
除了L4WUDU与吴亦凡已经多次共事,成为了明面上的厂牌成员,吴亦凡还曾带领20XXCLUB全队参加2020年的一场音乐节,这也是20XXCLUB首次全员合照,王嗣尧Turbo、陈彦希Regi、<em>Mac</em> Ova Seas、林渝植等人全部出场。然而让
2021-06-01 09:31:34
目前应用IPFS的机构:1 谷歌<em>浏览器</em>支持IPFS分布式协议 2 万维网 (历史档案博物馆)数据库 3 火狐<em>浏览器</em>支持 IPFS分布式协议 4 EOS 等数字货币数据存储 5 美国国会图书馆,历史资料永久保存在 IPFS 6 加
2021-06-01 09:31:24
开拓者的车机是兼容苹果和<em>安卓</em>,虽然我不怎么用,但确实兼顾了我家人的很多需求:副驾的门板还配有解锁开关,有的时候老婆开车,下车的时候偶尔会忘记解锁,我在副驾驶可以自己开门:第二排设计很好,不仅配置了一个很大的
2021-06-01 09:30:48
不仅是<em>安卓</em>手机,苹果手机的降价力度也是前所未有了,iPhone12也“跳水价”了,发布价是6799元,如今已经跌至5308元,降价幅度超过1400元,最新定价确认了。iPhone12是苹果首款5G手机,同时也是全球首款5nm芯片的智能机,它
2021-06-01 09:30:45